lemon bars
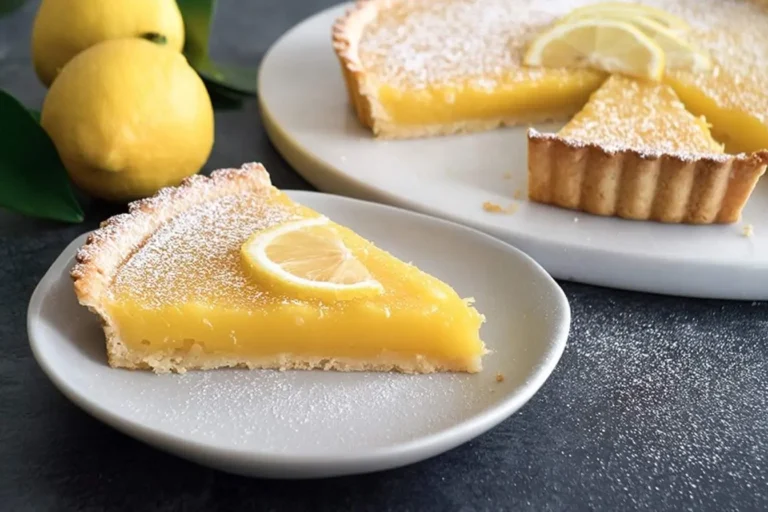
When the kitchen fills with the bright, zesty aroma of freshly baked lemon bars, I know it’s going to be a good day. These delightful treats, with their perfect balance of tangy and sweet, are like a ray of sunshine in dessert form, a true classic that brings cheer to any gathering. They’re as comforting and inviting as a batch of strawberry shortcake truffles, yet uniquely vibrant with their citrusy charm.
I remember learning to make these very lemon bars in my grandmother’s kitchen, tiny hands carefully zesting lemons while she guided me through making the perfect shortbread crust. The joy of pulling that golden pan from the oven, smelling the sweet lemon fill the air—those are moments I cherish and now share with my own daughter.
This recipe is designed to be a low-stress affair, bringing both refreshment and comfort with minimal fuss. My top tip? Always use fresh lemons; it truly makes all the difference in achieving that signature bright flavor.

What You Need to Make This Recipe
Crafting these delightful lemon bars requires just a handful of simple ingredients: fresh lemons for their vibrant juice and zest, rich unsalted butter for that tender shortbread, and eggs to create the creamy, tangy filling. It’s far less complex than a strawberry shortcake trifle, focusing on natural flavors to let the lemon shine. You’ll find the full list of measurements in the recipe card below.
How to Make lemon bars
Making these sunshine-filled lemon bars is a wonderfully straightforward process. You’ll begin by creating a simple, buttery shortbread crust, then prepare the bright and zesty lemon filling. Once combined, they bake into a golden perfection, ready to be chilled and dusted with powdered sugar. It’s a rewarding process that’s far less involved than baking a rich salted caramel Kentucky butter cake, yet just as satisfying.
Pro Tips
Making lemon bars is all about balancing simplicity with a few thoughtful touches to ensure the best results.
- For the Crust: Don’t overmix the shortbread crust ingredients; just combine them until they form a soft dough. Press it firmly and evenly into your pan to prevent a crumbly base.
- Fresh is Best: My absolute golden rule for the lemon filling is to always use fresh lemon juice and zest. The vibrant, natural flavor is unparalleled and truly makes these lemon bars sing.
- Don’t Overbake: Keep an eye on the lemon filling as it bakes. It should be set with a slight jiggle in the center, not firm like a cake. Overbaking can lead to a less creamy texture.
My Secret Trick: For that classic, beautiful finish, I always wait until my lemon bars are completely chilled and just before serving to dust them generously with powdered sugar. This prevents the sugar from dissolving into the surface and keeps them looking picture-perfect!

Fun Variations
While classic lemon bars are perfect as they are, sometimes it’s fun to play with flavors and textures! You can easily add a swirl of raspberry purée to the lemon filling before baking for a berry twist, or even try a brown butter crust for a nutty depth. I also love to experiment with a hint of lavender in the filling for a delicate floral note, much like finding new ways to enjoy a southern chocolate cobbler. These simple twists make lemon bars even more exciting.

How to Store lemon bars
Proper storage helps keep your lemon bars fresh and delicious! Once completely cooled, store them in an airtight container in the refrigerator for up to 5 days. If you’d like to prepare them further in advance, you can freeze individual bars, tightly wrapped, for up to 3 months. My personal tip? I always let my lemon bars come to room temperature for about 15 minutes before serving for the best texture and brightest flavor.
Nutritional Benefits
Lemon bars offer a delightful treat that can still be part of a balanced family diet. Fresh lemons provide a good source of Vitamin C, while the natural sugars offer a quick energy boost. Enjoying these lemon bars is about savoring a homemade dessert with fresh, natural ingredients.
FAQs
Can I use bottled lemon juice for lemon bars?
While you technically can, I strongly recommend using fresh lemon juice for your lemon bars. The vibrant, authentic flavor from fresh lemons truly elevates the taste, giving them that signature zesty brightness that bottled juice simply can’t match.
How do I know when my lemon bars are baked through?
Your lemon bars are ready when the filling is set around the edges but still has a slight jiggle in the center when gently shaken. The crust should be golden brown, and the filling a beautiful light yellow. Trust your instincts!
Why are my lemon bars gooey/runny?
Gooey or runny lemon bars usually mean they haven’t been baked long enough or weren’t chilled sufficiently. Ensure the filling reaches the proper set during baking and give them ample time to cool and firm up in the refrigerator, preferably for several hours or overnight.
Can I make lemon bars ahead of time for a party?
Absolutely! Lemon bars are an excellent make-ahead dessert. You can bake them a day or two in advance and store them in an airtight container in the refrigerator. In fact, chilling them overnight often enhances their flavor and texture.
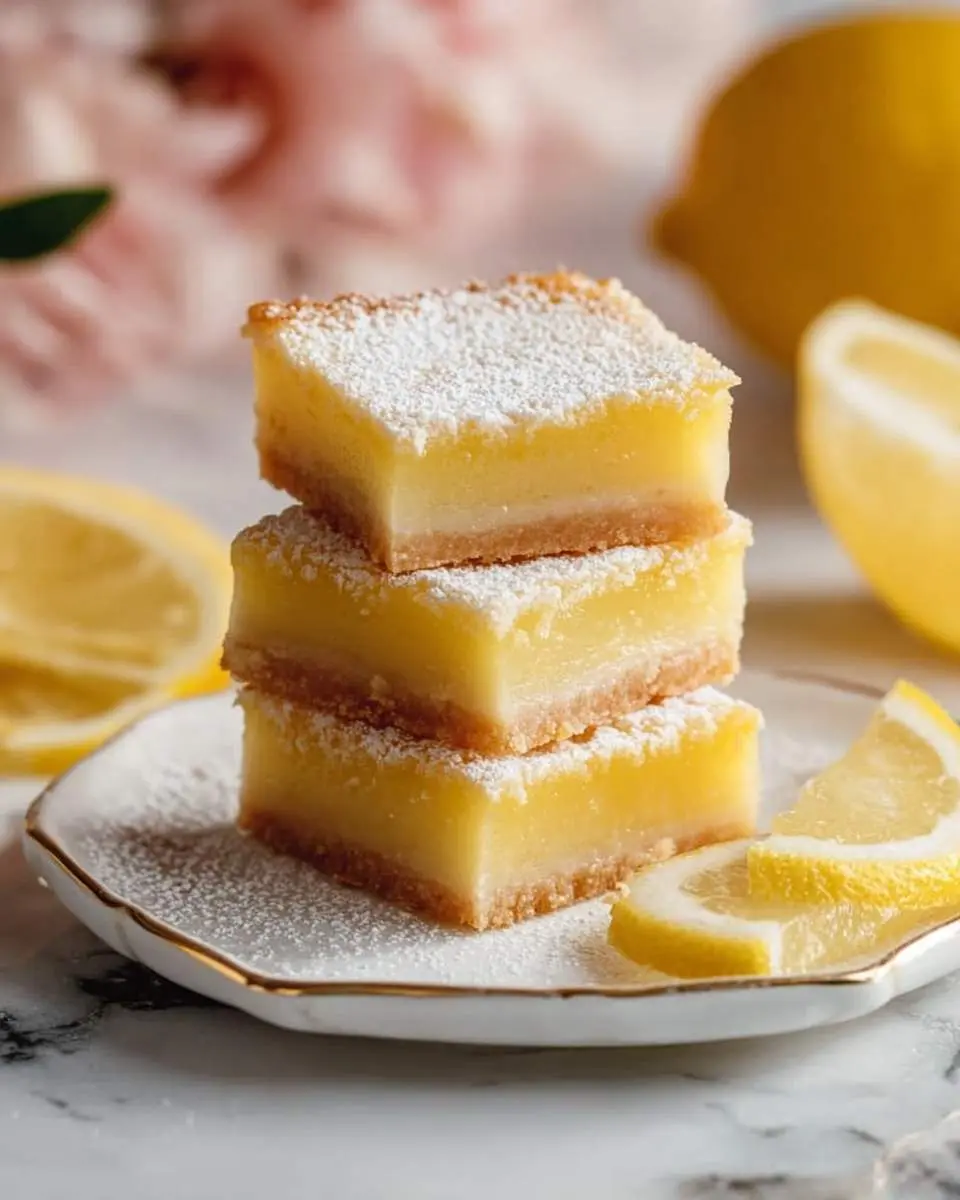

Classic Zesty Lemon Bars
Ingredients
Equipment
Method
- Preheat your oven to 350°F (175°C). Line an 8x8 inch baking pan with parchment paper, leaving an overhang on two sides to easily lift the bars out later. Lightly grease the parchment paper.
- In a large mixing bowl, combine the 1 1/2 cups all-purpose flour, 1/2 cup granulated sugar, and 1/4 teaspoon salt.
- Add the very cold, cubed unsalted butter to the dry ingredients. Using a pastry blender, your fingertips, or a food processor, cut the butter into the flour mixture until it resembles coarse crumbs.
- Press the mixture evenly and firmly into the bottom of the prepared 8x8 inch baking pan.
- Bake the crust for 18-20 minutes, or until the edges are lightly golden. Remove from the oven and set aside while you prepare the filling. Do not turn off the oven.
- While the crust is baking, in a medium mixing bowl, whisk together the 1 1/2 cups granulated sugar and 1/4 cup all-purpose flour until well combined. This prevents the flour from clumping when added to wet ingredients.
- Add the large eggs, fresh lemon juice, lemon zest, and baking powder to the sugar-flour mixture. Whisk thoroughly until smooth and well incorporated.
- Carefully pour the lemon filling over the warm, pre-baked shortbread crust in the pan.
- Return the pan to the oven and bake for an additional 20-25 minutes, or until the center is just set and no longer jiggly when gently shaken. The top may be very lightly golden.
- Remove the pan from the oven and let the lemon bars cool completely at room temperature on a wire rack. This can take 1-2 hours.
- Once completely cool, transfer the pan to the refrigerator and chill for at least 2 hours (or preferably longer, up to overnight) before cutting. Chilling is crucial for clean cuts and a firm texture.
- Once thoroughly chilled, use the parchment paper overhangs to carefully lift the entire slab of lemon bars out of the pan and onto a cutting board.
- Using a sharp knife, trim the edges if desired, then cut the slab into 16 squares (4 rows by 4 rows).
- Just before serving, dust the lemon bars generously with powdered sugar using a fine-mesh sieve.
Notes
To prevent the crust from becoming tough, avoid overworking the dough when cutting in the butter.
Leftover lemon bars can be stored in an airtight container in the refrigerator for up to 3-4 days. They are best served chilled.
Conclusion
Baking homemade lemon bars is truly a simple pleasure, bringing together the bright, zesty flavors of fresh lemons with a comforting shortbread crust. This recipe is a testament to how easy it is to create something truly special right in your own kitchen. I hope these classic lemon bars bring a burst of sunshine and joy to your family’s table, just as they do for mine.