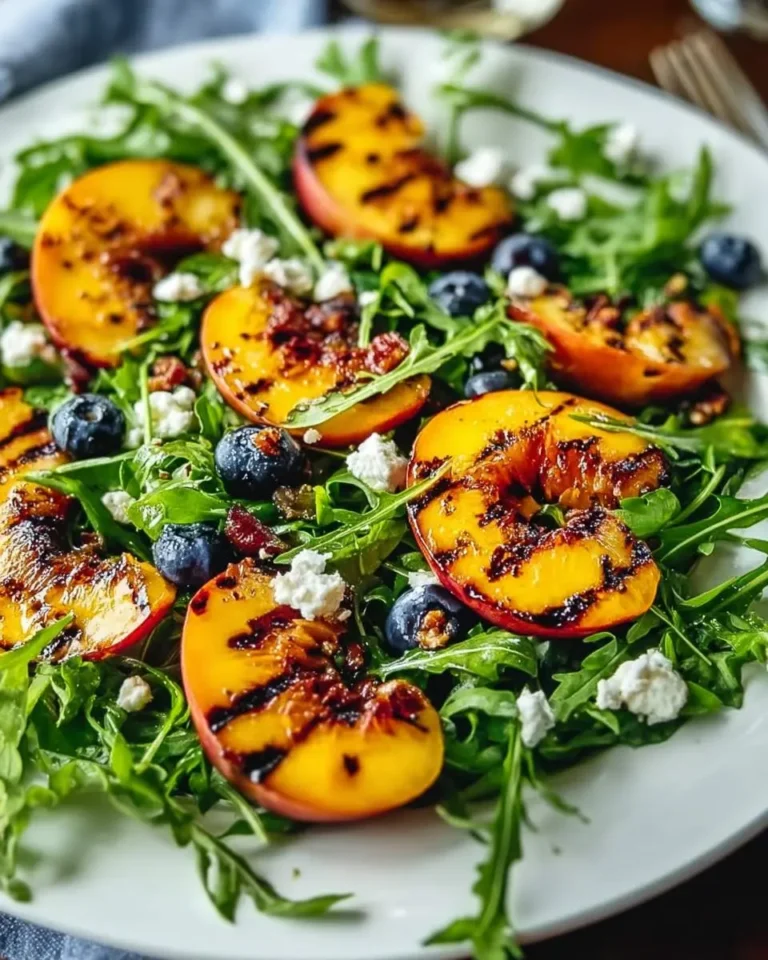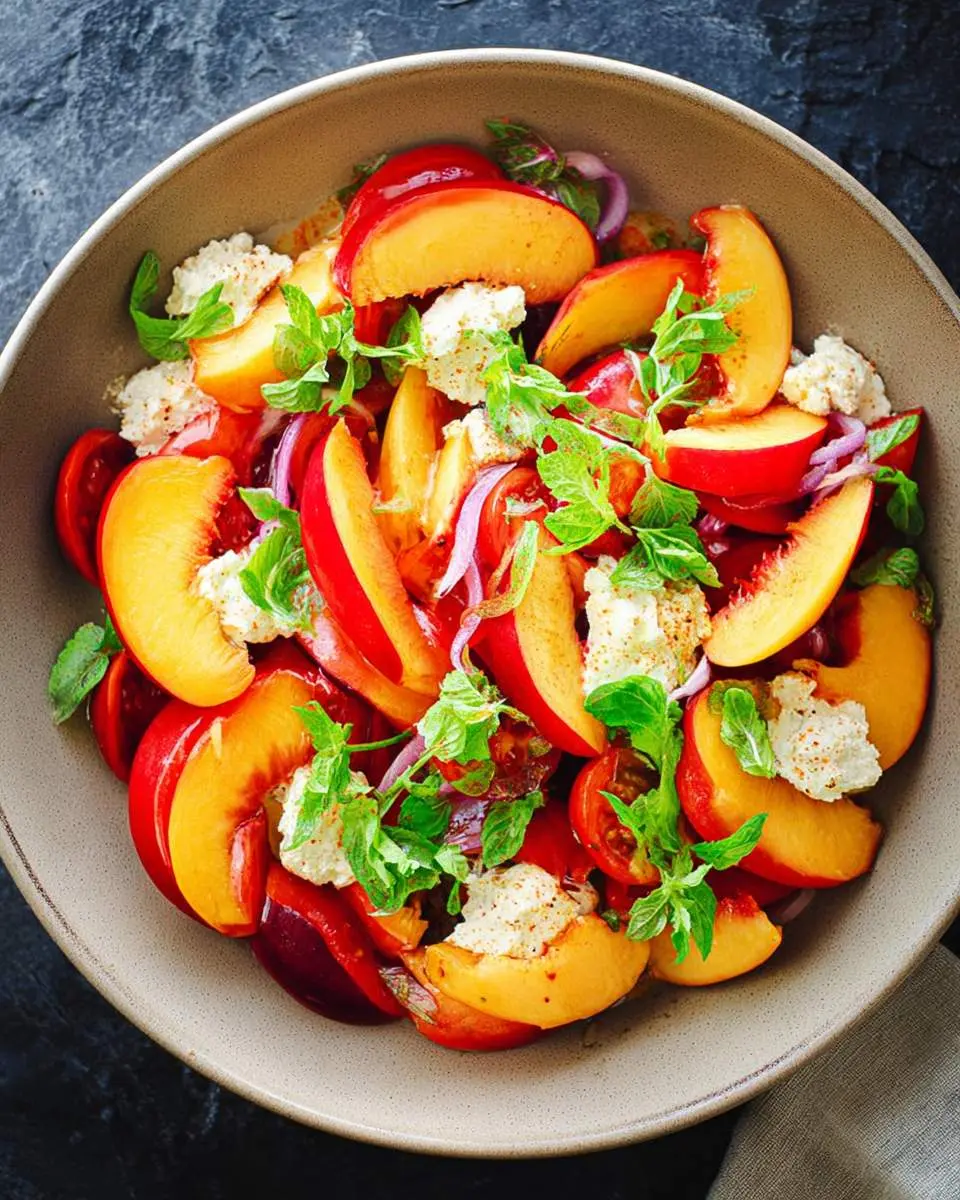
nectarine salad
There are some days when all I crave is something incredibly fresh, something that just bursts with sunshine and flavor. A few weeks ago, I had a pile of gorgeously ripe nectarines on my counter, blushing perfectly, and I knew they deserved to be the star of something truly special. That\’s how my favorite new nectarine salad came to be – a simple creation that completely blew me away.
\nI remember that afternoon so clearly; the light streaming into my kitchen, the sweet, heady scent of nectarines filling the air as I sliced them. It felt less like cooking and more like arranging edible jewels. It was one of those effortless moments that reminded me why I love being in the kitchen so much, transforming simple ingredients into something extraordinary.
\nThis recipe is my ode to those sweet summer days and the joy of simple, vibrant flavors. If you\’ve enjoyed my peach burrata salad, you\’ll find a similar spirit of fresh fruit magic here, but with its own unique twist.
\nWhat You Need to Make This Recipe
\nThe magic of this dish truly hinges on just a few key players. First, those beautiful, firm-yet-yielding nectarines are non-negotiable; their natural sweetness and slight tang are the heart of this nectarine salad. Then, there\’s the fresh mint and basil – they bring such an incredible lift and aroma, making every bite feel light and bright. And finally, my honey-lime vinaigrette, which perfectly balances the fruit with its zesty, sweet-tart personality. For another vibrant fruit combination, you might also love my avocado mango salad.
\n
How to Make nectarine salad
\nMaking this salad feels less like a task and more like an art project. I start by carefully slicing my nectarines, watching their vibrant flesh reveal itself, then gently layering them onto a serving platter. Next, I whisk together the honey-lime vinaigrette, and the kitchen fills with a wonderful citrusy aroma. It\’s such a satisfying process, seeing the colors come together.
\nThe dressing gets drizzled over everything, making the fresh herbs glisten. I love to let the whole thing sit for just a few minutes, allowing the flavors to meld and the nectarines to soak up a little of that incredible zesty sweetness. It\’s perfect for a quick, refreshing meal, just like my peach berry fruit salad.
\nPro Tips
\nWhen selecting your nectarines, choose ones that have a beautiful color and give slightly when gently squeezed, but aren\’t overly soft. This ensures they\’re sweet and juicy, but still firm enough to slice beautifully without turning mushy in your salad.
\nFor the freshest flavor, make sure your mint and basil are bright green and perky. I always give them a quick sniff before adding them – their aroma should be vibrant and strong, as this makes a huge difference to the overall taste of your nectarine salad.
\nTo really make the vinaigrette shine, whisk it thoroughly until it\’s emulsified, and then let it sit for about 10-15 minutes before drizzling. This allows the honey and lime flavors to fully develop and become cohesive, tasting so much better than if you use it immediately.
\nMy Secret Trick: After dressing the salad, let it rest for 5-10 minutes before serving. This brief moment allows the nectarine slices to absorb the vinaigrette, intensifying the flavors and creating a more cohesive, delicious experience without making them soggy.
\n
How to Store nectarine salad
\n- \n
- Store any leftover salad in an airtight container in the refrigerator for up to 1-2 days. \n
- If possible, store the dressing separately and add just before serving to maintain the freshest texture of the nectarines and greens. \n
- This salad is best enjoyed fresh; I don\’t recommend freezing it as the nectarines will lose their appealing texture. \n
Nutritional Benefits
\nBeyond being absolutely delicious, this nectarine salad also offers some wonderful nutritional perks. Nectarines themselves are packed with vitamins A and C, and a good source of dietary fiber, supporting overall wellness. The fresh herbs like mint and basil add antioxidants, while the lime provides an extra boost of vitamin C, making this a truly refreshing and nourishing dish.
\n
FAQs
\nCan I use peaches instead of nectarines?
\nAbsolutely! Peaches are a fantastic substitute for nectarines in this salad. Just make sure they are firm-ripe and not overly soft to maintain a good texture when sliced. The flavor profile will be very similar and equally delicious.
\nCan the honey-lime vinaigrette be made ahead of time?
\nYes, you can definitely prepare the vinaigrette a day or two in advance. Store it in an airtight container in the refrigerator. Just give it a good shake or whisk before using, as the ingredients might separate slightly.
\nWhat can I add to make this salad more substantial?
\nIf you want to turn this into a heartier meal, I love adding some grilled chicken or shrimp for protein. Crumbled goat cheese or feta would also be a lovely addition, offering a creamy, tangy contrast to the sweet fruit.
\nHow ripe should the nectarines be for this nectarine salad?
\nYou want nectarines that are ripe enough to be sweet and flavorful, but still firm. They should give slightly when gently pressed, but not feel mushy. This ensures they hold their shape beautifully and provide a pleasant bite.
\n

Skillet Taco Mac and Cheese Fiesta
Ingredients
Equipment
Method
- Bring a large pot of salted water to a boil. Add the elbow macaroni and cook according to package directions until al dente. Drain well and set aside.
- While the pasta cooks, heat olive oil in a large skillet over medium-high heat. Add ground beef and diced onion. Cook, breaking up the beef with a spoon, until browned and no pink remains, about 6-8 minutes. Drain any excess grease. Stir in the taco seasoning mix and water. Bring to a simmer and cook for 2-3 minutes until thickened. Remove beef from the skillet and set aside.
- In the same large skillet (no need to wash), melt butter over medium heat. Whisk in the flour and cook for 1 minute, stirring constantly, to create a roux.
- Gradually whisk in the warm milk until smooth and thickened, about 3-5 minutes. Reduce heat to low. Add shredded cheddar cheese and Monterey Jack cheese, stirring until completely melted and smooth. Stir in the sour cream, undrained diced tomatoes with green chilies, chopped cilantro, and diced jalapeño (if using). Season with salt and black pepper to taste.
- Add the cooked macaroni and the prepared taco beef to the cheese sauce in the skillet. Stir gently until everything is well combined and heated through.
- Serve immediately, garnished with crushed tortilla chips, extra shredded cheese, fresh cilantro, a dollop of sour cream, and salsa if desired.
Notes
• **Spice Level:** Adjust the amount of diced jalapeño or use a spicier taco seasoning to customize the heat. For less spice, omit the jalapeño.
• **Variations:** Try adding black beans or corn to the taco meat mixture for extra texture and flavor.
Conclusion
\nHonestly, this nectarine salad has become one of my go-to recipes for a light lunch or a refreshing side. It\’s just so simple, yet elegant, and tastes exactly like summer on a plate. I really hope you give it a try and discover its bright, beautiful magic for yourself. For more fruity salad inspiration, check out my blueberry peach feta salad!