Mulberry Jam
I woke up one sticky July morning craving something that tasted like sun on toast, and Mulberry Jam was exactly what my kitchen needed. The scent of lemon and simmering berries made me close my eyes and remember picking fruit with sticky fingers, the kind of small joy I keep returning to.
There was one summer when my grandmother and I made jam on her back porch while thunderstorms rolled past; she taught me to listen for the pop as jars sealed and to never rush the sugar stage. That memory is why I still slow down when the pot starts to bubble—I’ve learned flavors change if you hurry.
I turned that memory into a recipe I now reach for whenever the pantry feels empty but my heart wants comfort, and I even tucked a nod to my favorite fruit pie here: a rhubarb-mulberry pie I love.
What You Need to Make This Recipe
You only really need ripe mulberries, a bright lemon, and the right amount of sugar to balance them: the berries give body and tannin, lemon brightens the jam and helps set the natural pectin, and sugar controls texture and shelf life; for a fun read while you bake, I sometimes peek at a chocolate donut post that makes me irrationally happy.

How to Make Mulberry Jam
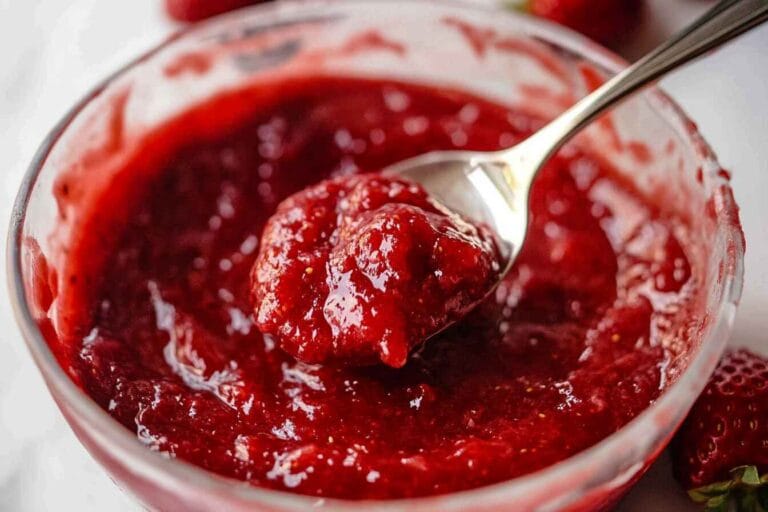
I start by rinsing and destemming the berries, then cook them low and slow so they break down gently instead of exploding all at once. At first the pot hisses quietly, then the smell turns from grassy to syrupy sweet, and you get those glossy, jewel-like pieces that tell you the sugar and fruit are marrying.
Once the mixture reaches a steady simmer, I add lemon juice and watch for the surface to thicken and the bubbles to change—larger, slower bubbles mean you’re getting to set. If you want a step-by-step pantry companion while cooking, I sometimes refer back to my dandelion jelly notes for tips on judging set without a thermometer.
Pro Tips
- Cook at a lively simmer rather than a violent boil so the berries keep some texture; violent boiling breaks seeds and darkens the color, which loses that bright summer look I chase.
- Skim foam when it first appears because it traps air and makes the jam cloudy; removing it gives a clearer, longer-lasting jar.
- Measure temperature with a candy or instant-read thermometer: aim for 220°F (104°C) for repeatable set, which protects the fresh fruit flavor while ensuring spreadability. My Secret Trick: Stir in a teaspoon of crushed, rinsed seeds from one vanilla bean at the very end; the warmth of the vanilla lifts the tartness and gives a silkier mouthfeel without hiding the berries.

How to Store Mulberry Jam
- Refrigerator: Store opened jam in airtight jars at 40°F (4°C) for 3–4 weeks; I label jars with the date so nothing lingers.
- Freezer: Freeze in airtight, freezer-safe containers or jars (leave 1/2″ headspace) up to 12 months; thaw in the refrigerator overnight.
- Reheating: Warm gently in a saucepan over low heat until just simmering (about 180°F/82°C) to loosen before using as a glaze or stirred into yogurt.
Nutritional Benefits
Mulberries bring vitamin C and antioxidants to the jar, while lemon juice adds more vitamin C and brightness, making this spread a flavorful way to add fruit to your morning; the sugar does add calories, so I treat a spoonful as a concentrated fruit serving.

FAQs
How long does it take for mulberries to break down when making this jam?
Once the pot reaches a steady simmer, mulberries usually break down in about 12–15 minutes; you’ll see the mixture thicken and the seeds suspended in a glossy syrup. Stir occasionally to prevent sticking and listen for the change in bubble size.
Can I use frozen mulberries and will the texture differ?
Frozen berries thaw into more liquid, so I thaw and drain some juice to avoid a runny jam; frozen fruit can make a slightly softer set, so watch the temperature and extend cooking by a few minutes to reach that gel point.
How do I test if the jam has set without a thermometer?
Drop a small spoonful onto a chilled plate and tilt it; if it wrinkles and holds shape after a few seconds it’s likely set. I keep a plate in the freezer before cooking so this test is always ready.
Is there a recommended sugar ratio for a less-sweet jar?
I prefer a 1:1 fruit-to-sugar ratio for balance, but you can reduce sugar by about 20% and cook a touch longer to concentrate the mixture; remember lower sugar raises the chance of a looser set, so adjust expectations accordingly.


One-Pan Lemon Garlic Chicken with Spinach & Cherry Tomatoes
Ingredients
Equipment
Method
- Pat chicken thighs dry with paper towels. Season both sides evenly with 3/4 tsp of the kosher salt, 1/4 tsp black pepper and the paprika. Zest and juice the lemon; halve the cherry tomatoes and mince the garlic.
- Heat a 10-inch skillet over medium-high heat until hot. Add 1 tbsp olive oil and swirl. Add chicken in a single layer (work in batches if needed) and sear without moving until the underside is golden brown, about 4-5 minutes. Flip and cook the second side until golden and the internal temperature reaches 155°F (it will finish cooking in the sauce), about 4 minutes more. Transfer chicken to a plate and tent loosely with foil.
- Reduce heat to medium and add the remaining 1 tbsp olive oil. Add garlic and cook, stirring, until fragrant, about 30 seconds (don’t let it brown). Add the halved cherry tomatoes and a pinch of the remaining salt and pepper; cook, stirring occasionally, until the tomatoes blister and begin to collapse, about 4-5 minutes.
- Pour in the chicken broth, lemon juice and lemon zest, scraping any brown bits from the pan with a wooden spoon. Bring to a gentle simmer and cook 2-3 minutes to reduce slightly and concentrate flavor.
- Add the baby spinach and butter to the skillet. Stir until the spinach wilts and the butter melts into the sauce, about 1-2 minutes. Taste and adjust seasoning with the remaining 1/4 tsp kosher salt and 1/4 tsp black pepper if needed.
- Return the chicken to the skillet, nestling into the sauce and vegetables. Spoon sauce over the thighs and simmer gently until chicken reaches 165°F internal temperature and is cooked through, about 2-3 minutes. Sprinkle with chopped parsley and serve straight from the pan with pan sauce spooned over.
Notes
Conclusion
I love how a simple jar can bottle a long afternoon of memories, and Mulberry Jam does that with each spoonful; it’s bright, slightly tart, and stubbornly summery. If you want a custardy follow-up, I often pair my jars with a rustic tart from this rhubarb custard pie.