red velvet poke cake
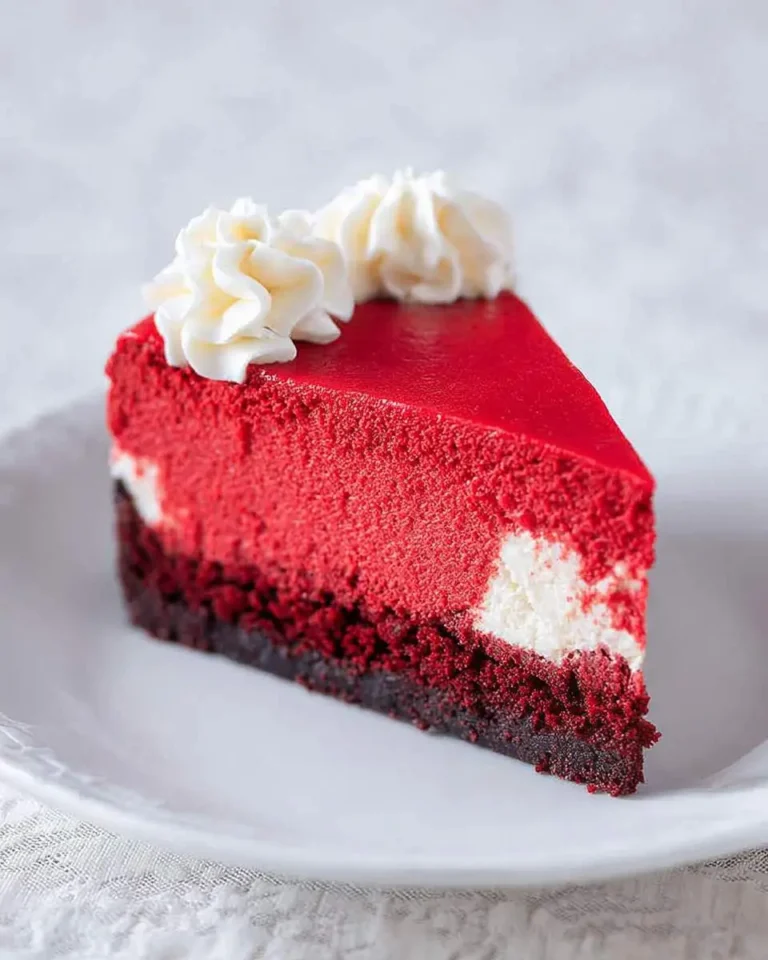
A slice of red velvet poke cake is pure joy, isn’t it? The way the vibrant red crumb peeks through the creamy frosting, promising a mouthful of moist, tender cake infused with a delightful filling. It’s a comforting classic, much like how a good chocolate poke cake offers that satisfying indulgence. This dessert isn’t just a dessert; it’s a celebration in every bite.
I remember my grandmother’s kitchen, the scent of vanilla and cocoa always lingering. She taught me that the simplest ingredients could create the most memorable moments, and a red velvet poke cake was often at the heart of our family gatherings, a tradition my daughter now loves to help me carry on.
This recipe brings that homemade magic to your table with minimal fuss. It’s incredibly moist and surprisingly simple to prepare, making it perfect for a weeknight treat or a special occasion. My secret for a truly tender cake? Don’t overmix the batter!
What You Need to Make This Recipe
My red velvet poke cake relies on simple heroes: flour, cocoa, and buttermilk. These create that wonderfully moist, flavorful base, much like how rhubarb coffee cake celebrates key ingredients. Full details are in the recipe card below!

How to Make red velvet poke cake
Making this red velvet poke cake is a delightful process, beginning with preparing the tender red velvet cake, much like the satisfying bake of a lemon blueberry cake. Once baked, you’ll gently poke holes and pour over the creamy filling, letting all those delicious flavors soak in. Finish with a dreamy cream cheese frosting for a truly unforgettable dessert that brings smiles to every family meal.
Pro Tips
To get the perfect red velvet poke cake every time, I’ve gathered a few tricks from my own kitchen.
- My Secret Trick: For the deepest red color without compromising flavor, use a high-quality red food coloring and don’t skimp. It really makes the cake pop!
- Temperature Matters: Ensure your buttermilk, eggs, and cream cheese are at room temperature. This helps them combine smoothly, creating a more uniform and tender batter and frosting.
- Don’t Overmix: Mix the batter just until combined. Overmixing develops the gluten too much, leading to a tough cake instead of the moist, tender crumb we all adore.

Fun Variations
One of the joys of baking, just like with my carrot cake muffins, is making a recipe your own, and this red velvet poke cake is wonderfully versatile! Here are a few ways my family loves to switch things up:
- Chocolate Drizzle Delight: After frosting, melt some dark or white chocolate and drizzle it over the top for an extra layer of decadence. My daughter loves adding mini chocolate chips too!
- Seasonal Berry Boost: Garnish your finished cake with fresh raspberries or strawberries, especially when they’re in season. The tartness beautifully cuts through the richness.
- Nutty Crunch: For a textural contrast, sprinkle chopped pecans or walnuts over the frosting. This adds a lovely crunch that we all enjoy.

How to Store red velvet poke cake
To keep your red velvet poke cake as fresh and delicious as possible, proper storage is key. Once completely cooled and frosted, I always store any leftover cake in an airtight container in the refrigerator for up to 3-4 days. The cream cheese frosting needs to stay chilled! If you want to enjoy a slice later, simply let it come to room temperature for about 15-20 minutes before serving to ensure the dessert is moist and the frosting is creamy.
Nutritional Benefits
This red velvet poke cake offers a delightful treat, crafted with real ingredients for joyful moments. It’s a wonderful way to satisfy a sweet craving while enjoying homemade goodness.
FAQs
What makes red velvet poke cake so moist?
The incredible moisture in this red velvet poke cake comes from a few key ingredients: buttermilk, vegetable oil, and the sweetened condensed milk poured into the pokes. These elements combine to create a tender, juicy crumb that is simply irresistible and keeps the cake fresh for days.
Can I make the red velvet poke cake ahead of time?
Absolutely! This red velvet poke cake is fantastic when made a day ahead. Preparing it in advance allows the condensed milk filling to fully soak, intensifying flavor and moisture. Just frost it the day you plan to serve for the freshest presentation.
Why is buttermilk used in red velvet poke cake?
Buttermilk is a star in red velvet poke cake! Its acidity reacts with baking soda, helping the cake rise and tenderizing the crumb. It also contributes to the cake’s signature tang and deepens the red color when combined with cocoa.
Can I use a different frosting for red velvet poke cake?
While classic cream cheese frosting perfectly complements red velvet poke cake, feel free to experiment! A fluffy vanilla buttercream or even simple whipped cream offers a lighter alternative. Just ensure your chosen frosting holds up well to chilling, maintaining the cake’s integrity.


Luscious Red Velvet Poke Cake
Ingredients
Equipment
Method
- Preheat your oven to 350°F (175°C). Lightly grease and flour a 9x13 inch baking pan.
- In a large bowl, whisk together the all-purpose flour, granulated sugar, cocoa powder, baking soda, and salt. Set aside.
- In a separate medium bowl, whisk together the buttermilk, vegetable oil, eggs, and vanilla extract.
- Gradually add the wet ingredients to the dry ingredients, mixing with an electric mixer on low speed until just combined. Do not overmix.
- Stir in the red food coloring and white vinegar until the color is evenly distributed.
- Pour the cake batter evenly into the prepared baking pan. Bake for 30-35 minutes, or until a wooden skewer inserted into the center comes out clean.
- Let the cake cool completely in the pan on a wire rack, about 1 hour.
- While the cake cools, prepare the poke filling. In a medium bowl, beat the softened cream cheese with an electric mixer until smooth.
- Gradually add the sweetened condensed milk and vanilla extract, beating until well combined and smooth.
- Once the cake is completely cool, use the back of a wooden spoon or a large skewer to poke holes all over the top of the cake, about 1 inch apart. Make sure the holes go almost to the bottom of the cake.
- Evenly pour the cream cheese condensed milk mixture over the poked cake, ensuring it seeps into all the holes.
- Cover the cake loosely with plastic wrap and refrigerate for at least 2 hours (or preferably overnight) to allow the filling to set and absorb.
- In a large bowl, using an electric mixer, beat the softened butter and softened cream cheese together until light and fluffy, about 2-3 minutes.
- Gradually add the sifted powdered sugar, 1 cup at a time, mixing on low speed until incorporated. Then increase speed to medium and beat until smooth.
- Stir in the vanilla extract and pinch of salt. Beat on medium-high speed for another 1-2 minutes until the frosting is light and fluffy.
- Once the poke cake has thoroughly chilled, spread the cream cheese frosting evenly over the top.
- For an optional garnish, crumble a small piece of leftover cake (or trim the edges) and sprinkle the red crumbs over the frosting.
- Refrigerate for at least 30 minutes before slicing and serving. Store any leftover cake in an airtight container in the refrigerator.
Notes
Conclusion
This red velvet poke cake truly embodies everything I love about homemade desserts – it’s comforting, vibrant, and brings so much joy to our family table. With its moist crumb and creamy frosting, it’s a recipe that’s both simple to create and deeply satisfying to share. I encourage you to whip up this delightful dessert and experience the warmth and happiness it brings to your everyday moments. Happy baking from my kitchen to yours!