
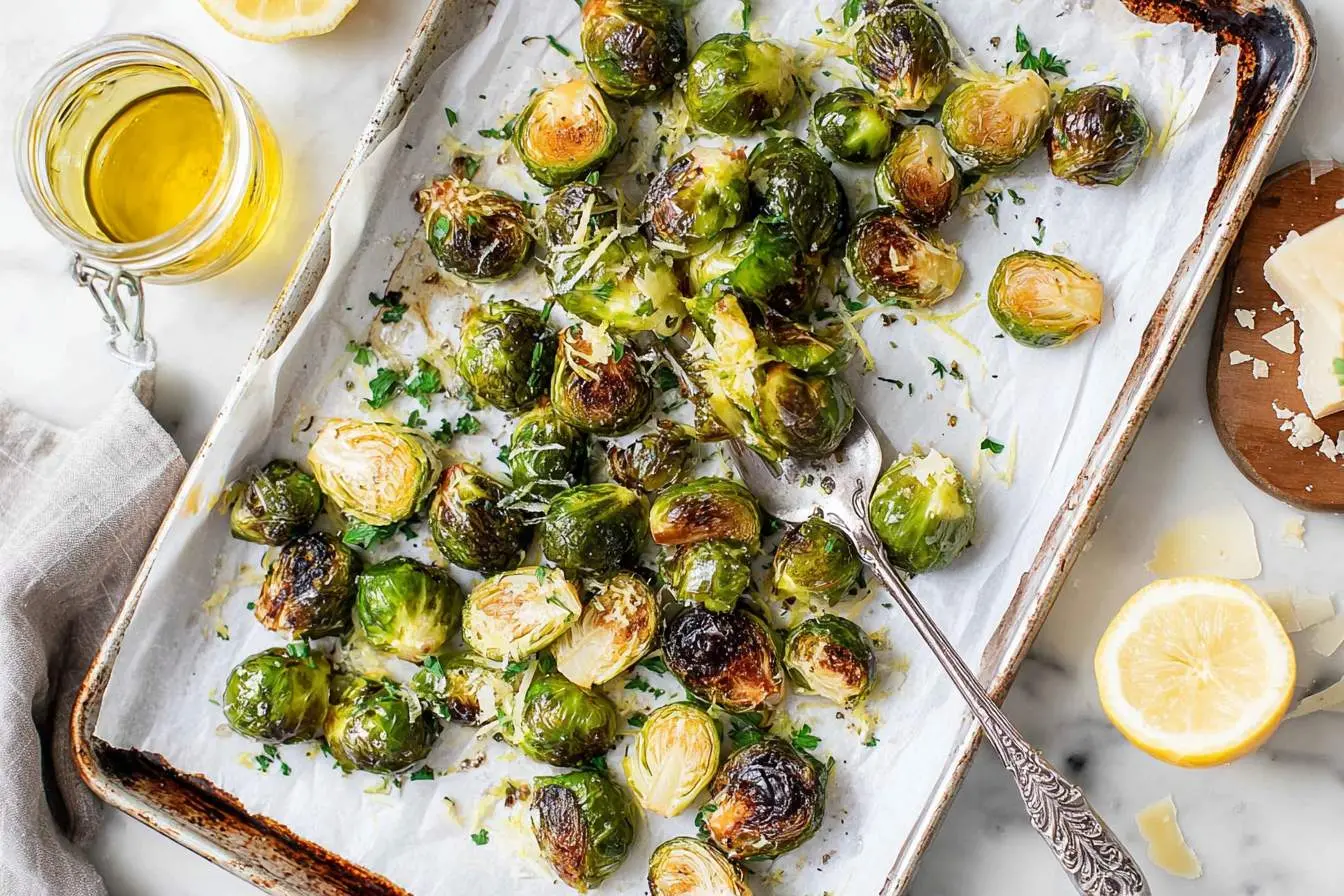
I remember the first time I made these for Thanksgiving. The whole house filled with the incredible aroma of caramelizing sprouts and smoky bacon, and I knew I’d found a keeper. These aren’t just any roasted brussels sprouts; they’re a perfect harmony of crispy, tender, sweet, and savory. They have become such a staple on my holiday table that I can’t imagine serving my favorite creamy mashed potatoes without them. The rich, tangy glaze makes every bite an unforgettable experience.
You’re Going to Love This Recipe, Here’s Why
This dish is my secret weapon for a stress-free holiday side that tastes like you spent hours on it. With just 15 minutes of active prep and a 25-minute roast, it comes together so quickly, freeing me up to focus on the main course or just enjoy a quiet moment with my family. The magic is in the simplicity of the ingredients, which combine to create something truly special.
Hearty brussels sprouts, salty thick-cut bacon, and crunchy pecans are elevated by an elegant glaze of balsamic vinegar and pure maple syrup. It’s that perfect balance of salty, sweet, and tangy that gets everyone reaching for seconds. It delivers a gourmet flavor experience with minimal effort, which is exactly what I need during busy celebrations. It proves that a side dish can be both incredibly easy and the talk of the table.

Ingredient Notes for Balsamic Maple Roasted Brussels Sprouts with Bacon
For this recipe, I always reach for thick-cut bacon for its meaty texture and rich flavor. When it comes to the glaze, using pure maple syrup is non-negotiable; its authentic flavor is miles ahead of pancake syrup. It’s the same principle I follow for my favorite roasted butternut squash recipe.
Balsamic Maple Roasted Brussels Sprouts with Bacon
Ingredients
Equipment
Method
- Preheat your oven to 425°F (220°C). Position a rack in the middle of the oven.
- In a large mixing bowl, toss the trimmed and halved brussels sprouts with olive oil, kosher salt, and black pepper until they are evenly coated.
- Spread the seasoned brussels sprouts in a single, even layer on a large rimmed baking sheet, cut-side down. This helps them get a nice, deep caramelization.
- Roast for 20-25 minutes, flipping them halfway through, until they are tender and the outer leaves are crispy and browned. The roasting time may vary depending on the size of the sprouts.
- While the brussels sprouts are roasting, place the chopped bacon in a small skillet over medium heat. Cook, stirring occasionally, until the bacon is brown and crispy, about 6-8 minutes. Use a slotted spoon to transfer the crispy bacon to a paper towel-lined plate, reserving about 1 tablespoon of the bacon grease in the skillet.
- Add the chopped pecans to the same skillet with the reserved bacon grease. Toast over medium-low heat, stirring frequently, for 2-3 minutes until fragrant and lightly browned. Remove from heat and set aside.
- In a small bowl, whisk together the balsamic vinegar, pure maple syrup, and dijon mustard until well combined. This is your glaze.
- Once the brussels sprouts are done roasting, transfer them from the hot baking sheet back into the large mixing bowl. Immediately pour the balsamic glaze over the hot sprouts and toss gently to coat everything evenly.
- Add the crispy bacon and toasted pecans to the bowl and toss one last time. Transfer to a serving dish and serve immediately while warm.
Notes
How I Make Balsamic Maple Roasted Brussels Sprouts with Bacon Step-by-Step
Bringing this dish to life is one of the easiest parts of my holiday cooking. I start by getting the brussels sprouts coated in olive oil, salt, and pepper, then spread them on a baking sheet to roast. Getting them tender on the inside with those delightfully crispy, browned outer leaves is key. While they’re in the oven, I crisp up the chopped bacon in a skillet and prepare the simple balsamic maple glaze on the stovetop.
The kitchen smells absolutely divine at this point! Once the sprouts are perfectly roasted, I gently toss everything together in a large bowl and serve immediately. It’s a beautiful, last-minute assembly that pairs wonderfully alongside a tangy homemade cranberry sauce, bringing the whole meal together with a final flourish of flavor.
My Tips for the Perfect Outcome
- Don’t crowd the pan! Give the sprouts space to roast, not steam.
- Cut sprouts into uniform halves for even cooking.
- Toast the pecans separately for the best crunch and flavor.
- Drizzle the glaze on right before serving to keep everything crisp.
How I Serve and Store This Dish
I love serving these sprouts warm, straight from the oven, as the star side dish on my Thanksgiving table. The vibrant flavors and textures make them an instant crowd-pleaser. If I have any leftovers, I store them in an airtight container in the refrigerator for up to three days. To reheat, I simply warm them in a skillet over medium heat or in the oven to help bring back some of their original crispiness.
Frequently Asked Questions
Can I prepare these roasted brussels sprouts ahead of time?
Yes, partially! I recommend roasting the sprouts and cooking the bacon a day in advance. Keep them in separate airtight containers in the refrigerator. When ready to serve, simply reheat them in the oven, then toss with the freshly made glaze and pecans.
Is there a vegetarian alternative to bacon?
Absolutely! To make this dish vegetarian, you can omit the bacon. For a similar savory depth, I suggest tossing the sprouts with a teaspoon of smoked paprika before roasting or adding some savory, crispy shiitake mushrooms at the very end of cooking.
What can I use instead of pecans?
This recipe is wonderfully flexible when it comes to nuts. I’ve often swapped the pecans for toasted walnuts, slivered almonds, or even shelled pistachios. Each nut brings its own unique character, so feel free to experiment with your favorite or whatever you have on hand.
My balsamic glaze is too thin. How can I fix it?
Don’t worry if your glaze seems thin at first! The solution is to simply let it simmer gently on the stove for a few more minutes. The key is to allow the liquid to reduce until it becomes syrupy and can coat the back of a spoon.
Conclusion
This recipe is more than just a side dish; it’s a cherished part of my holiday tradition. It’s a guaranteed hit next to a classic Thanksgiving stuffing. I hope it brings as much warmth and flavor to your table as it does to mine. If you try it, please let me know in the comments!