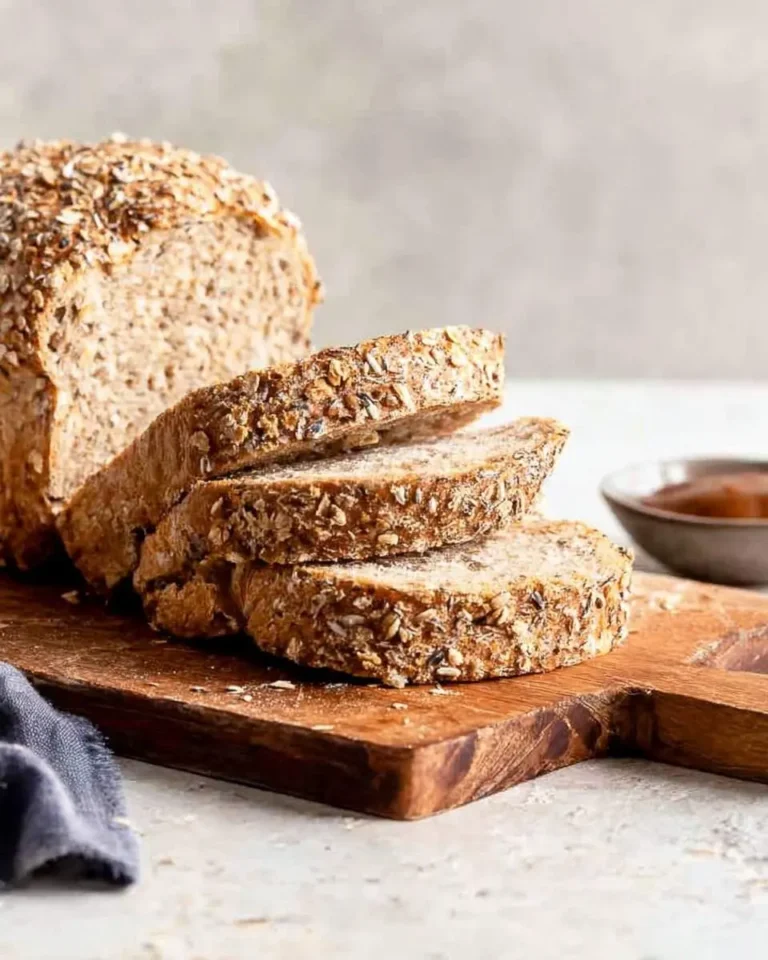
Sourdough Sandwich Bread
There’s nothing quite like the aroma of freshly baked bread filling my kitchen, and this Sourdough Sandwich Bread is a true game-changer. It’s got that perfect crusty exterior, a wonderfully soft and airy interior, and a tangy flavor that makes every bite a little piece of heaven. It’s become a cornerstone in my home, much like our beloved Sourdough Herb and Garlic Twist Loaf for dinner.
I remember growing up, the smell of my grandmother’s baking would always pull me into the kitchen, a tradition I’ve loved recreating with my own children. There’s a certain magic in the slow, natural process of sourdough, a connection to culinary heritage that I deeply cherish.
This recipe for Sourdough Sandwich Bread offers such hearty, comforting results without being overly complicated. It’s incredibly rewarding to slice into a loaf you’ve made yourself. My practical tip? Always trust your senses—the dough will tell you what it needs!
What You Need to Make This Recipe
Crafting this delightful Sourdough Sandwich Bread begins with a few simple, high-quality ingredients. We rely on an active sourdough starter for that signature tang, warm water to bring the dough to life, and good bread flour for structure. A touch of fine sea salt enhances all the flavors, and a little olive oil adds tenderness, similar to how I approach my Honey Oat Sourdough Bread Recipe. The full list with exact measurements is in the recipe card below, so you can easily gather everything you need.

How to Make Sourdough Sandwich Bread
Making your own Sourdough Sandwich Bread is a journey of patience and incredible reward. We start by preparing a levain the night before, which is essentially feeding your starter, giving it a strong start. The next morning, we mix the dough, then embark on a bulk fermentation with several stretch and folds to develop that beautiful gluten. After shaping, it gets a cold proof overnight, which deepens the flavor wonderfully. Finally, on day two, we bake it to golden perfection. It’s a process that truly brings out the best in Einkorn Sandwich Bread and other artisan loaves.
Pro Tips for Making This Sourdough Sandwich Bread
Over the years, I’ve picked up a few insights that truly elevate this Sourdough Sandwich Bread from good to absolutely fantastic. I always pay close attention to the feel of the dough during the stretch and folds; it should feel alive and elastic. Don’t rush the bulk fermentation; let the dough tell you when it’s ready, not the clock, especially for a perfect Sourdough Sandwich Bread.
My Secret Trick: When shaping your Sourdough Sandwich Bread, I always aim for a really tight surface tension. This helps create that beautiful, even crumb and ensures your loaf holds its shape perfectly during baking. A little bit of olive oil on your hands can help prevent sticking without adding too much flour.
Another tip I swear by is to make sure your sourdough starter is truly active and bubbly before you begin. A weak starter can lead to a dense loaf, and we want that lovely open texture for our Sourdough Sandwich Bread. Don’t be afraid to experiment with the proofing times slightly based on your kitchen’s temperature and humidity; every environment is a little different!

How to Store Sourdough Sandwich Bread
To keep your homemade Sourdough Sandwich Bread fresh and delicious, proper storage is key. Once it’s completely cooled, I typically store my loaf cut-side down on a cutting board, or in a breathable bread bag at room temperature for up to 3-4 days. For longer storage, you can slice the Sourdough Sandwich Bread and freeze it. I always wrap individual slices in plastic wrap, then place them in a freezer-safe bag.
When I want to enjoy a slice, I simply pop a frozen piece into the toaster or warm it gently in the oven. This method brings it back to life beautifully, giving you that fresh-baked taste and texture. My personal tip for reheating is to mist it lightly with water before a quick refresh in a warm oven; it helps restore that lovely crust!
Nutritional Benefits
This homemade Sourdough Sandwich Bread isn’t just delicious; it also offers wonderful nutritional benefits. Sourdough fermentation can make grains easier to digest and increases nutrient availability, like B vitamins and minerals. For my family, it’s a hearty and wholesome choice that contributes to a well-rounded diet, making every meal featuring this Sourdough Sandwich Bread a nourishing experience.

FAQs
How long does it take to make Sourdough Sandwich Bread?
While the active prep time for Sourdough Sandwich Bread is only about 30 minutes, it’s a multi-day process involving an overnight levain, bulk fermentation, and a cold proof. This allows for deep flavor development, resulting in a truly artisan loaf that’s worth the wait.
Can I use whole wheat flour in this Sourdough Sandwich Bread recipe?
Absolutely! While this recipe uses bread flour for a classic texture, you can certainly substitute a portion of it with whole wheat flour for a nuttier flavor and denser crumb. I suggest starting with 25-30% whole wheat to maintain the structure of your Sourdough Sandwich Bread.
Why is my Sourdough Sandwich Bread dense?
A dense Sourdough Sandwich Bread can often be attributed to an inactive starter, insufficient gluten development during stretch and folds, or inadequate proofing time. Ensure your starter is bubbly and active, and give your dough enough time to rise and develop before baking.
What is the best way to get a crispy crust on my Sourdough Sandwich Bread?
Achieving a crispy crust on your Sourdough Sandwich Bread relies on steam in the oven during the initial baking phase. Baking in a Dutch oven or using a baking stone with a tray of hot water can create the perfect steamy environment for that irresistible, crackly crust.


Artisan Sourdough Sandwich Bread
Ingredients
Equipment
Method
- If your starter isn't already active, feed it 8-12 hours before you plan to mix your dough. Combine 20g mature starter with 40g water and 40g bread flour. Let it sit at room temperature until it's very active, bubbly, and passes the float test (a small dollop floats in water).
- In a large mixing bowl, combine the warm water and the active sourdough starter. Stir gently to break up the starter. Add the bread flour and mix with a spoon or your hand until no dry bits of flour remain and a shaggy dough forms. This is the autolyse stage. Cover the bowl with plastic wrap or a shower cap and let it rest for 30-60 minutes.
- After the autolyse, sprinkle the salt over the dough, then drizzle with the olive oil. Use wet hands to incorporate the salt and oil into the dough. Squeeze and fold the dough for about 5 minutes until the ingredients are fully integrated and the dough starts to become more cohesive. It might feel a bit messy at first.
- Cover the bowl and let the dough rest for 30 minutes. Perform your first set of stretch and folds: Wet your hands slightly, grab a portion of the dough from one side, stretch it upwards, and fold it over to the opposite side of the bowl. Rotate the bowl a quarter turn and repeat this process 3 more times until you've stretched and folded all four sides. This should take about 1-2 minutes.
- Repeat the stretch and fold process every 30-45 minutes for a total of 3-4 sets. The dough will become progressively stronger, smoother, and more elastic with each set. After the last set, cover the bowl and let the dough continue to bulk ferment undisturbed at room temperature (72-78°F / 22-26°C) for another 1-2 hours, or until it has visibly increased in volume by about 30-50% and feels light and airy.
- Lightly flour your work surface. Gently turn the dough out onto the surface. Preshape the dough into a loose rectangle or round. Let it rest for 20-30 minutes, uncovered, to relax the gluten.
- To shape for a loaf pan: Gently flatten the dough into a rectangle. Fold the top third down to the middle, then the bottom third up and over, sealing the seam. Turn the dough 90 degrees and repeat: fold the top third down, then the bottom third up, sealing the seam tightly. Gently roll the dough into a log, maintaining tension on the surface. Ensure the seams are pinched completely closed.
- Lightly grease your 9x5 inch loaf pan, or line it with parchment paper for easy removal. Carefully transfer the shaped dough log into the prepared loaf pan, seam-side down. Cover the pan tightly with plastic wrap or place it in a large plastic bag. Refrigerate for 12-18 hours (or up to 24 hours). This cold proof develops flavor and makes the dough easier to score.
- Preheat your oven to 450°F (232°C) with a rack in the middle, at least 30 minutes before baking. If you like, place an empty broiler pan or cast iron pan on the bottom rack for creating steam.
- Carefully remove the loaf pan from the refrigerator. Lightly dust the top of the dough with flour and, using a sharp blade or lame, score the top of the loaf with one long slash down the middle, or several smaller slashes.
- Place the loaf pan in the preheated oven. If you're creating steam, pour about 1 cup of hot water into the hot pan on the bottom rack (be careful of the steam!). Immediately close the oven door.
- Bake for 20 minutes with steam. Then, carefully remove the steam pan (if used) and reduce the oven temperature to 400°F (200°C). Continue baking for another 20-25 minutes, or until the crust is deeply golden brown and the internal temperature of the bread reaches 200-210°F (93-99°C).
- Remove the loaf from the pan immediately and transfer it to a wire rack to cool completely for at least 2-3 hours before slicing. Slicing too early will result in a gummy texture.
Notes
Conclusion
There’s something incredibly satisfying about pulling a warm, fragrant loaf of homemade Sourdough Sandwich Bread from the oven. This recipe delivers a beautiful, flavorful bread that’s perfect for everything from simple toast to hearty sandwiches. It embodies my philosophy of creating warm, comforting, and practical food for busy families. I truly encourage you to give this Sourdough Sandwich Bread a try; I promise, the effort is so worth the reward, whether you’re making this or even my Burger Buns. Happy baking!